Attic venting, like other related building concepts, should be Climate Specific. Homes built in frigid climates have different needs than homes built in sunny climates. This becomes especially important when considering a reflective insulation product. We've discovered that a reliable and efficiently powered venting system has the necessary air exchange to remove hot, stagnant attic air.
The attic venting code is primarily designed for moisture removal in cold climates, not superheated air in a hot climate. Click here to study the UBC code on attic venting.
If you are considering the purchase of a solar powered attic fan I encourage you to read this page completely. Get the facts before you buy any energy conservation product. Make sure the company you choose can provide 3rd party independent testing that can verify claims of performance.
The importance of venting your attic cannot be overlooked. In cold climates improper venting can lead to moisture buildup which can cause condensation, mold growth, and even wood rot in extreme cases. I have even found ice in attic insulation.During the summer stagnant, superheated attic air can dry out your trusses, increase your energy costs due to demand on the air conditioning unit, and make your house uncomfortable.
Our patented reflective insulation products reject the infrared heat emitted by hot roofs. Usually this heat builds up in the attic and makes it even hotter. Getting rid of this waste heat then forced us to look at not only how homes are vented, but the US home building codes that dictate what is needed for adequate ventilation. What we found was amazing. Codes for attic venting are the same all over the US regardless of the climate, and are designed for moisture egress, not the removal of hot air. Furthermore, in most homes that do have venting, the vents are often plugged with insulation (see photos below).
Let's start with a principle of basic physics: Hot air rises. Heated air rises due to a differential in density where cooler, heavier air flows downward.
It should be easy for hot air to rise out of your attic, right? When driven by the density differential the exhaust should bring in fresh air from vents located around the base of the roof (soffits). There is no "pressure" that drives hot air out of an attic. The pressure inside your attic is the same as it is outside (based on a no wind condition). Wind blown across a roof can create a positive pressure on the windward side and a lower pressure on the lee side which can force ventilation but only if there is sufficient (and constant) wind to create this. Only the differential buoyancy of heated air over the temperature of ambient air is different.
Using a tracer gas and smoke generators we have documented all types of attic venting, the appropriate sizes that work in hot climates and have posted our findings below. This is not a scientific study but observations made over the study of hundreds of homes in all types of climates.
Our proven field results and recommendations (if using a radiant barrier material and passive vents):
Ridge venting, installed at the peak of the roof, may be attractive and easy to install and never leaks but testing proves a ridge vent actually traps air in the attic. "Hot air rises" is a basic law of thermodynamics yet a ridge vent consists of an inverted "V". This creates a thermal check valve which does not allow the hot air to escape properly during the summer and once covered with 2" of snow is rendered useless (check ice dam page for more info).
Puffing tracer smoke inside the attic in a home we built in Phoenix at 2pm showed the air in the attic to be stagnant. We have found that homes with ridge venting are historically the hottest, and correspondence from our customers who have read this site reinforce this over and over. We get letters/emails like this often from home owners all over the country after reading this website on attic venting:
"Last fall I had a new roof installed. My old roof was shake. My new roof is a TAMKO American Heritage series laminated fiberglass asphalt roof. My old roof had approximately 12 Pot vents. With the shake shingles the attic was hot in the summer, but not 135 degrees like it is now on 100 degree days. Most of my attic is accessible from the inside. My new roof has ridge vents. The old vents were disposed of! My roofer reassured me several times that the new ridge vents would perform better than the pot vents because they had more square footage of opening for heat to dissipate through! Maybe so, but my attic is hotter that it ever was. Asphalt shingles are hotter that shakes. My contractor dismissed this as an issue because of the additional square footage of venting available from the ridge vents.
Any help would be greatly appreciated."
Doug M
The reality of solar attic fans:
The claims of CFM movement are overrated and not tested by any 3rd party laboratory. Our testing has shown a solar fan with an 11 watt panel, (facing South), moves 315 CFM. That's less than half of what is advertised. Good idea but not enough power. Even if 22 watts moved twice the CFM's, it's still less than half of what a 1400 square foot home needs for active powered venting. Many of the problems of solar powered fans stems from the way they are manufactured. Bushings, not bearings get dry from hot attic air, dry out and the fan seizes. Being a DC motor it has brushes which begin wearing out the moment the sun hits the panel. Once the brushes wear out the fan stops working.
Whirlybirds (the aluminum spinning vents) have less than one square foot of roof opening and do not induce air movement while spinning. Aspirate your attic naturally (no power fans) wherever and whenever possible. A well ventilated attic does not need power venting. We suggest using the Aura vent for the best airflow and minimum leak potential.
In cold climates it is imperative that each rafter bay be open to the soffit area and free air allowed to move from the soffit area into the attic. This will keep mold from forming, ice dams at bay and the attic cooler during the summer. (see our ice dam page). It is also imperative in cold climates to keep any attic insulation that is in direct contact with the ceiling from touching the roof as the slope nears the outside walls. Direct contact between the insulation and roof decking creates a "thermal wick" and provides a path of heat that melts the snow on the roof which then travels to the edge of the roof, freezes and can create ice dams and problems.
If you have to use a power fan (tile roofs, inaccessible areas, flat roofs), don't look for one at a home store. The older fans (ten years ago), had better motors, better bearings and a thermostat that could be relied upon to control the fan. Our radiant barrier installations rely heavily on the removal of the waste heat generated by our products. We have found a fan made in Germany that is: quiet, vibration free, and with permanently lubricated bearings, which we mate with a quality high voltage adjustable thermostat. If you have to use a fan, this is the one to use.
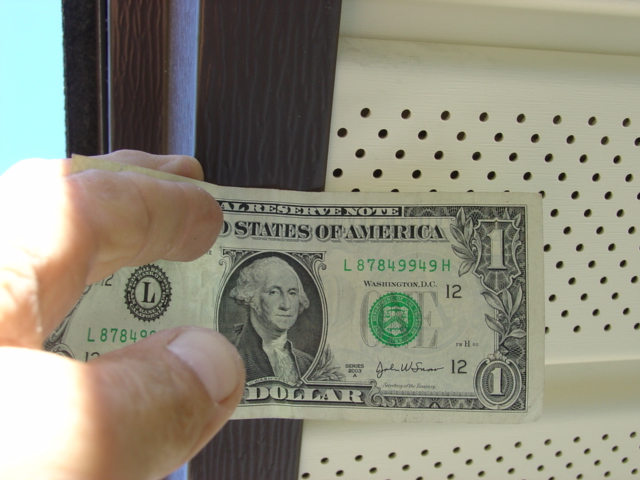
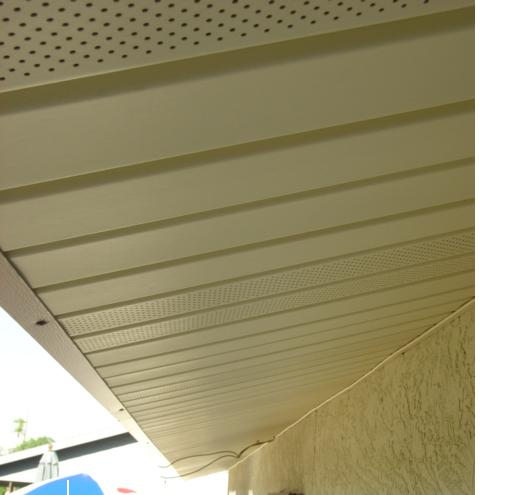
What works, what doesn't: CONTINUOUS SOFFIT VENTING Continuous soffit venting is typically a 2" or 3" slot cut into the soffit into which is placed on a manufactured venting system made from plastic or metal. The plastic is typically molded with thousands of small holes (1/32" in diameter), to keep bugs out. Great idea, easy to install but falls short of offering enough net free area to allow enough air to move.
Another popular type is an aluminum strip with small louvers pressed into them. BENEFITS: Easy to install and attractive. PROBLEMS: The holes are too small (see photo below), preventing the attic from aspirating naturally. Most often these are covered with insulation or partially plugged over time with dust/pollen/spider webs .
See our formula below for how many to add per square foot of attic area.
WHIRLYBIRDS:
The correct term is "air motor", also called roof turbines. It is thought that the spinning turbine creates some sort of suction which induces air movement. This has not been proven. They are often used in large commercial applications for venting smoke and fumes from a manufacturing plant. The wind spins the turbine which is connected by a shaft to a fan blade below which spins and pulls the air from the building. Turbines used in the residential market do not have these internal fans and therefore can exhaust only what the roof opening dictates. Mathematically, a 10" whirlybird offers 78.5 square inches of net free area, a 12" unit offers 113" square inches.
Venting an attic using natural aspiration is based on net free area. Use this to calculate the size of intake vents (soffit) and exhaust vents (at the top of the roof). We recommend Aura Vents for natural venting. Whirlybirds are better than most vents but in my opinion, make a house look like an industrial building and then there's the potential of the bearing going out and having it squeak. Despite the small area of these vents, the vertical stack of this vent allows for the fastest flow of air from a hot attic. For best performance, these vents should be placed as close to the peak of the roof as possible.
O'Hagen Vents (typically for tile roofs): Somehow meet code, but attics with these vents that we smoke tested, showed little to no air movement.
"Pop" Vents: Better than nothing but the openings are not big enough for air to efficiently move out of them.
Ridge Vents: Totally useless unless you live where the wind is consistently blowing. If there is no wind, a ridge vent is useless. We have proven this using smoke testing inside the attic. Fact: hot air rises. Fact: Hot air, at the highest point of the attic, must turn around, somehow defy physics and basic thermodynamic principles, flow down away from the highest point and flow out? Smoke testing has proven this does not happen. Ever see a hot air balloon go down? Hot smoke from a fire go down? It doesn't. Neither does hot air in an attic with a ridge vent.
Aura Vent: While visiting the Texas A&M testing facility I saw a new vent being tested that we now embrace as the best method for passive venting. It has the stack effect of a whirlybird but no moving parts. Click here
Since our reflective attic insulation products increase attic temperature by rejection instead of absorbing infrared heat, attic venting plays an important part of our system. Getting rid of this waste heat is essential to reduce energy consumption and increase interior comfort. If your home is under vented, the most effective and cost effective way to increase venting is using our imported German attic fan. Install it in the hottest side of the house (South or West) so it will draw the coolest air possible (East or North side), into the attic.

Ridge Venting vs. Dormer Vents
Having installed our reflective radiant barrier in homes for over 26 years, we have found that the rejected heat, (previously absorbed by the insulation and passed on later), winds up in the attic making the attic hotter, much hotter in fact than an attic without a radiant barrier. This means the attic must be properly vented by adding additional natural aspiration (adequate soffit vents and properly sized and placed exhaust vents). If it is not, then a homeowner should install a quality attic fan (seen below) to exhaust the excess heat. A properly vented attic, naturally or with a powered attic fan, should be only a few degrees above the outside ambient temperature. Ridge vents are very attractive and easy to install, but they just don't work. Everyone thinks it best to put an attic exhaust vent at the peak where the attic air is the hottest. Sounds logical except for one basic fact: Hot air rises, it doesn't go down. A ridge vent design dictates hot air must fight gravity and travel down from the peak of the roof in order to escape. This is unrealistic and so is expecting this type of vent to be effective. The only "driving force" that makes hot air leave an attic is the differential density of the 140 degree F lighter attic air compared to the more dense ambient outside air. Prove it for yourself: buy a 2000 CF smoke canister, place it in a coffee can in the center of the attic and light it. Then go outside and wait for the smoke to come out of the ridge vent.
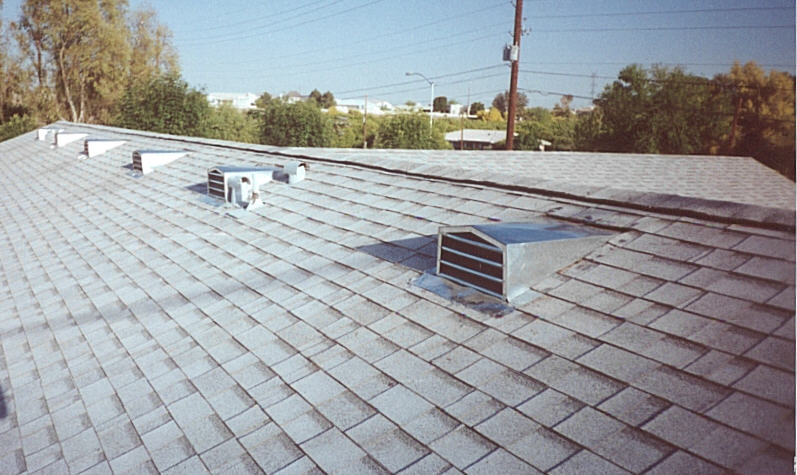
The roof you see above was built using a continuous ridge vent. When the hot weather came in April to this Phoenix home, the attic was like an oven despite the fact the intake venting (soffits), were doubled to insure good flow. We cut the first hole in this roof about noon to install the dormer vents you see above and the air came out so fast if you kicked the sawdust into the hole it would hit you in the face! Proof that the hot, stagnant attic air is not being vented properly and being trapped by the ridge vent design. Furthermore, the steeper the roof pitch, (like homes in Texas or the older Cape Cod homes in the Midwest), the less the ridge vent will work. This observation is based on fact, physics and common sense. Hot air does not fight gravity. Further, in cold climates, it only takes a few inches of snow to render ridge vents completely useless....when you need them the most to keep the roof from getting warm, melting the snow and creating ice dams. Inadequate venting is a major contributor to costly ice dams.
UPDATE ON THE ABOVE HOUSE: 5/11/2003
As you just read, we installed the ridge vent on this home in 1990 and found it to be absolutely worthless. Puffing smoke up under the vent in a hot, stifling attic showed NO movement of air up through the vent. So we went back and added the six dormer vents. The attic was still too hot so we blocked off all the dormer vents, installed a 16" German fan in the center, blocked off the oversized gable vents and now drawing cool air in through the soffits. I once thought that passive vents would be suffice when using a radiant barrier which makes attics hotter. On this home the passive venting was many times what the minimum USB code required and was still not enough. With summer soon upon us, we will be doing more attic temperature testing but one thing is certain: after having experimented with every type of vent combination available it appears the best way to remove hot, stagnant air is by using a reliable powered ventilator.
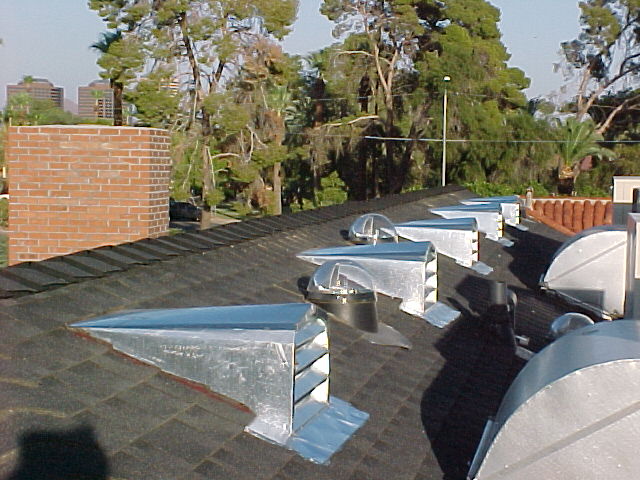
Dormer vents installed on the back side of a home in Dallas where the hottest attic air temperature was ever recorded by our NRG Auditor. Two reasons:
1) The underside of the roof decking was sprayed with silver radiant barrier paint thus lowering the emissivity and increasing the convective currents in the attic space.
2) Ridge vents trapped the hot air inside. The dormers shown here dropped the attic temp by 42 degrees. Solution: TCM6 over the insulation and increased venting.
SOFFIT VENTING
Soffit vents are considered the intake vents. The square area of the intake vents should match or exceed the square vent area of the exhaust vents which should be placed as close to the peak of the roof as possible. Most of the homes we have inspected do have soffit vents but are blocked by improperly installed insulation. Proper attic ventilation is necessary and the products listed below will help.
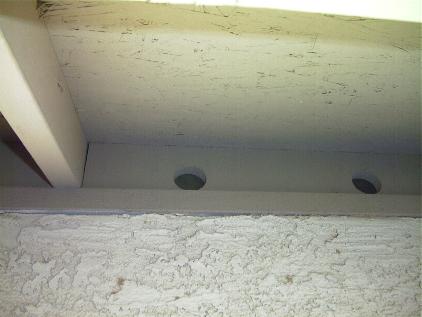
This is what you may see when you look at your venting around the perimeter of your home - "My attic has hundreds of holes around the perimeter, we don't need any more venting"
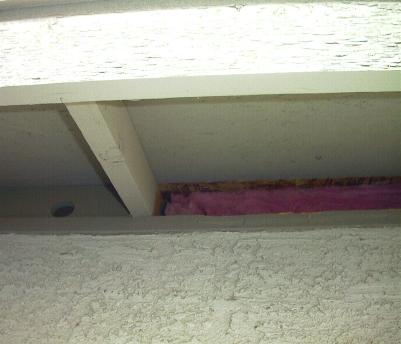
Remove the blocking and you can see the fiberglass blocking the vent holes. Very common problem found during our NRG Audit inspections.

With the bird blocks removed, we then screen the area with 1/4" galvanized screen and secure it with screws.
This procedure gives your attic the air it needs to properly vent. In cold climates this allows adequate moisture removal and the elimination of the associated problems, like mold growth and wood rot. In hot climates, the super heated attic air can flow out the upper vent (if you have them), and draw cooler air in around the house. This is what your architect and builder expected. However, in most homes the insulation contractor may have plugged up some or all of your soffit vents. Our home energy auditors have found most homes have this problem. Check yours or click here to schedule an energy audit for your home (if you live in the Phoenix area). If you have questions about your existing attic vents, take a few digital pictures and send them to us for evaluation. Take advantage of our knowledge and free advice! Take one of each side of the home, include photos of the soffits vents (if any), gable vents (if any), and one or two shots of the attic.
Step by Step Soffit Venting
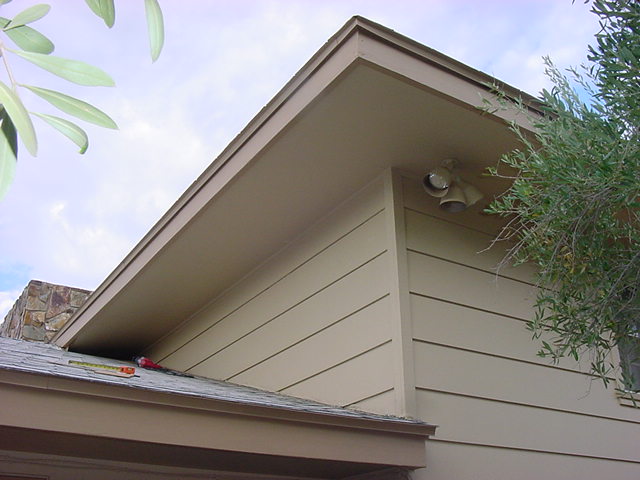
The soffits on this home were completely blocked making the attic like an oven increasing energy costs and making the upstairs unbearable during the summer. This is very common in homes of all ages, even new homes across the country.
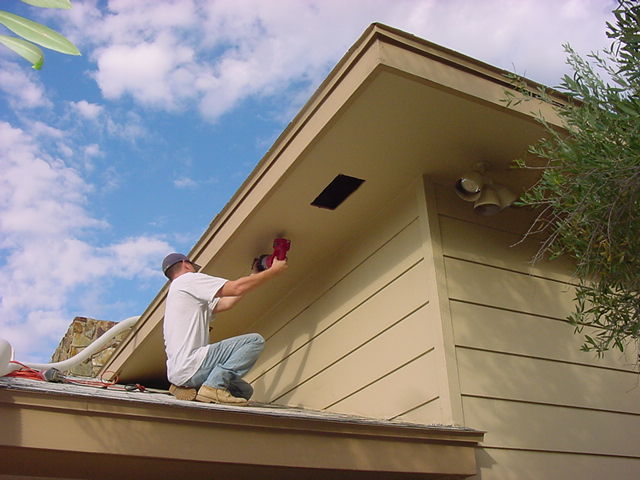
Cutting holes in the plywood soffit to allow intake air to cool the attic. The first thing you need to do before cutting any holes is snapping a chalk line so the vent holes are cut straight.

Once you get the holes cut, simply cover them with 8"x16" louvered intake grills available at Home Depot for $4.

The completed installation. Efficient, inexpensive and lasts forever. Paint the grills after the installation to match the soffits and they blend right in.
Homes we have upgraded attic vents on have significantly reduced attic temperatures during the summer. This means lower A/C bills (and stress on the equipment), and more comfort! In cold climates, these vents allow for the egress of accumulated moisture which is the source of many problems.
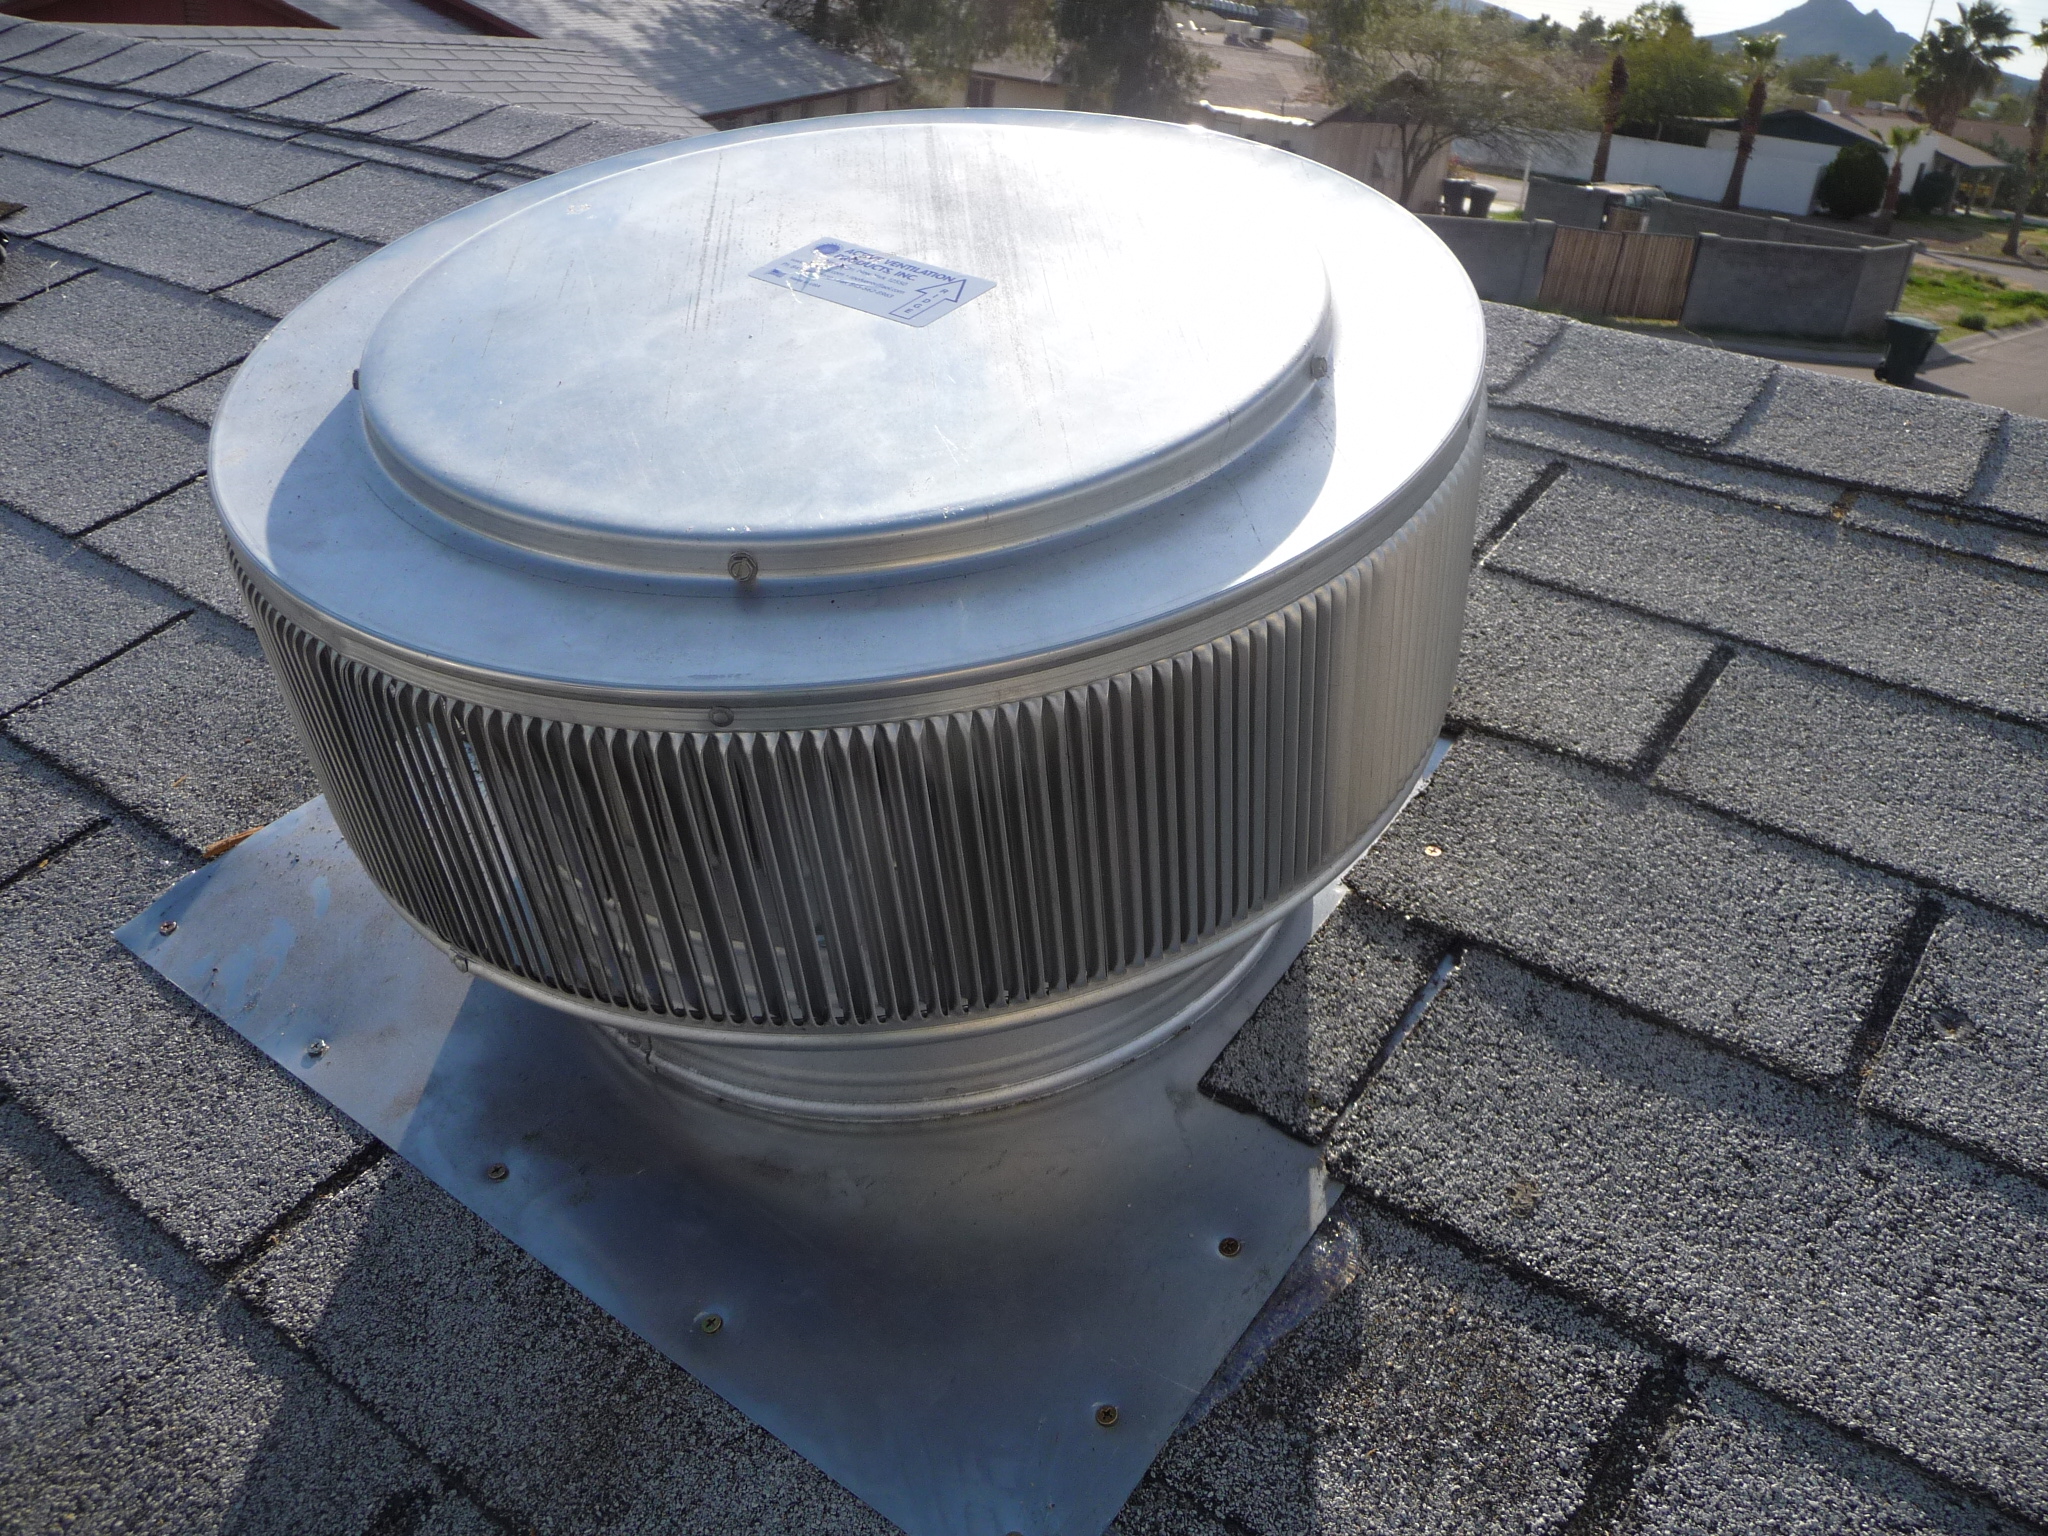
This is an 18" Aura vent installed on a pitched roof. The round inner stack acts like a chimney and the double grilled reverse vertical louvers keep out rain, bugs, and birds, and allow air to flow out freely. This is the recommended roof vent when considering the use of our German attic fan below it. These have been wind tunnel tested to 200mph and are Dade county rated for hurricanes.
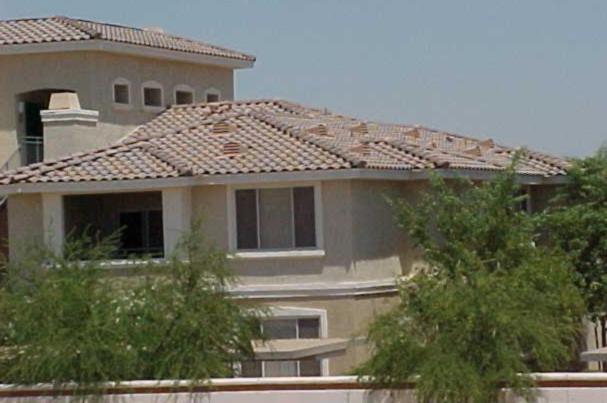
Dormer vents installed correctly on the back side of an apartment building. The lower vents on the roof are intake vents, and the upper vents are exhaust vents. This type of venting, if correctly sized to the volume of the attic, can adequately vent the hot air out during the summer and moisture during the winter. These are not visible from the front of the building and do not detract aesthetically.
POWER VENTING
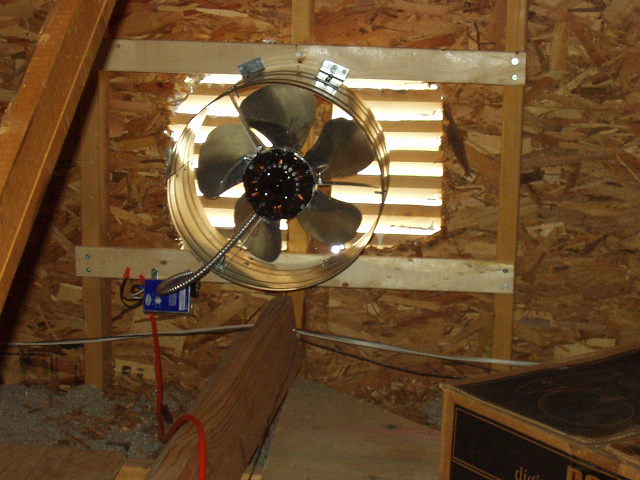
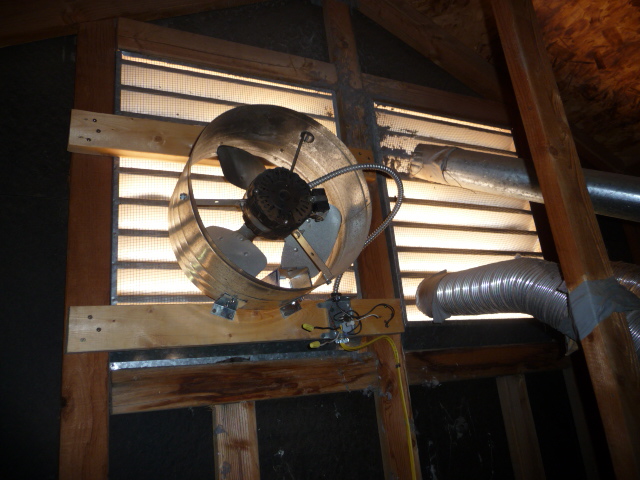
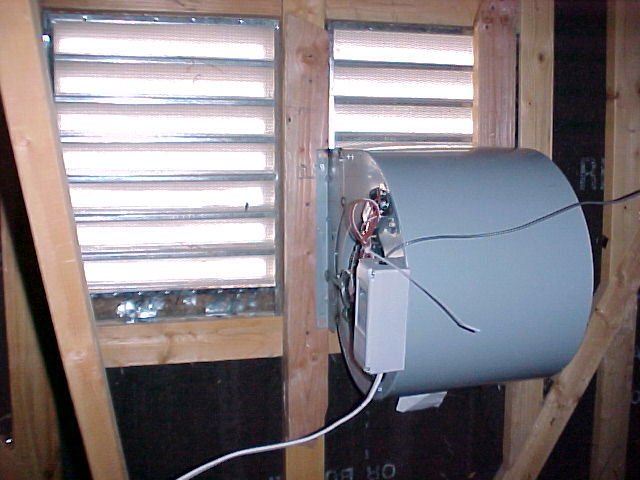
This shows a typical home store attic fan installed on a gable vent inside the attic. Although the mounting looks secure, the application is incorrect since the space around the fan is not blocked off. Air will always take the path of lease resistance. The fan will draw air from the closest point, in this case, from vent openings around the side of the fan. This means very little air will be exhausted from the attic! The open area around the fan shroud (the round ring), needs to be blocked off with cardboard or wood to make this type of installation effective.
Photos of what not to do:
This fan is only using electricity and not exhausting the attic air because of the open vent right next to it.
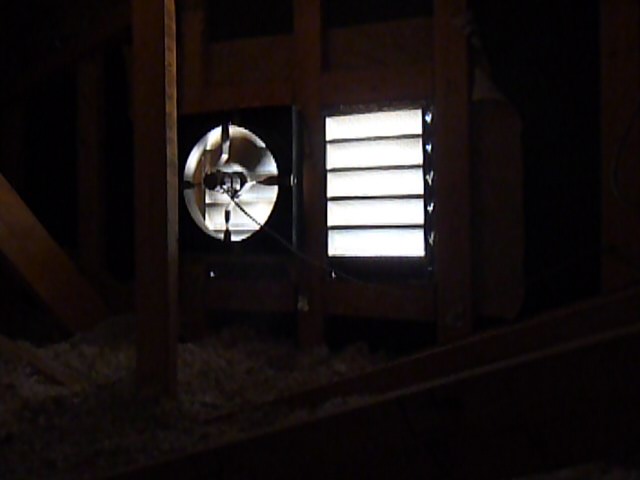
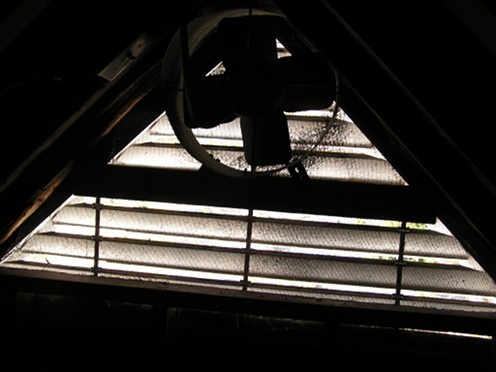
"Yes, I have an attic fan, installed it myself". Attic fan mounted in the center of the attic nowhere near a vent.
The homeowner who installed this (and the insulation at the roof deck), was an engineer. Neither installation is correct. The fans will just move air around each other and not ventilate the attic. Furthermore, both fans were seized when we replaced them with one 14" German fan and blocked the area around it. Notice the insulation packed against the roof. This just stores heat for many hours after the sun goes down.
Great idea, improper installation.
Summary: Think of the fan installed as an air pump. The fan will exhaust air from the rear of the fan and push it through the vent. The key is understanding where the intake air is being provided. In all of the photos above, most of the intake air is being drawn in around the fan since this is the path of least resistance. To make this work correctly, all the area around the fan needs to be blocked off as well as roof vents or soffit vents that are too close to the fan. When designing a venting system that employs a powered fan, the goal is to evacuate the hot air from the attic and bring in the coolest air possible. This dictates mounting the fan on the hottest part of the home (the South or West side), so the coolest air possible (the North or the East side), will be drawn into the attic.
STAY AWAY FROM UNDERPOWERED SOLAR ATTIC FANS. THEY JUST DON'T MOVE ENOUGH VOLUME OF AIR! Great idea, not enough power and does not match the needs of the task. Attic venting is most needed between 1pm and 7pm and the solar fan reaches max power at noon.
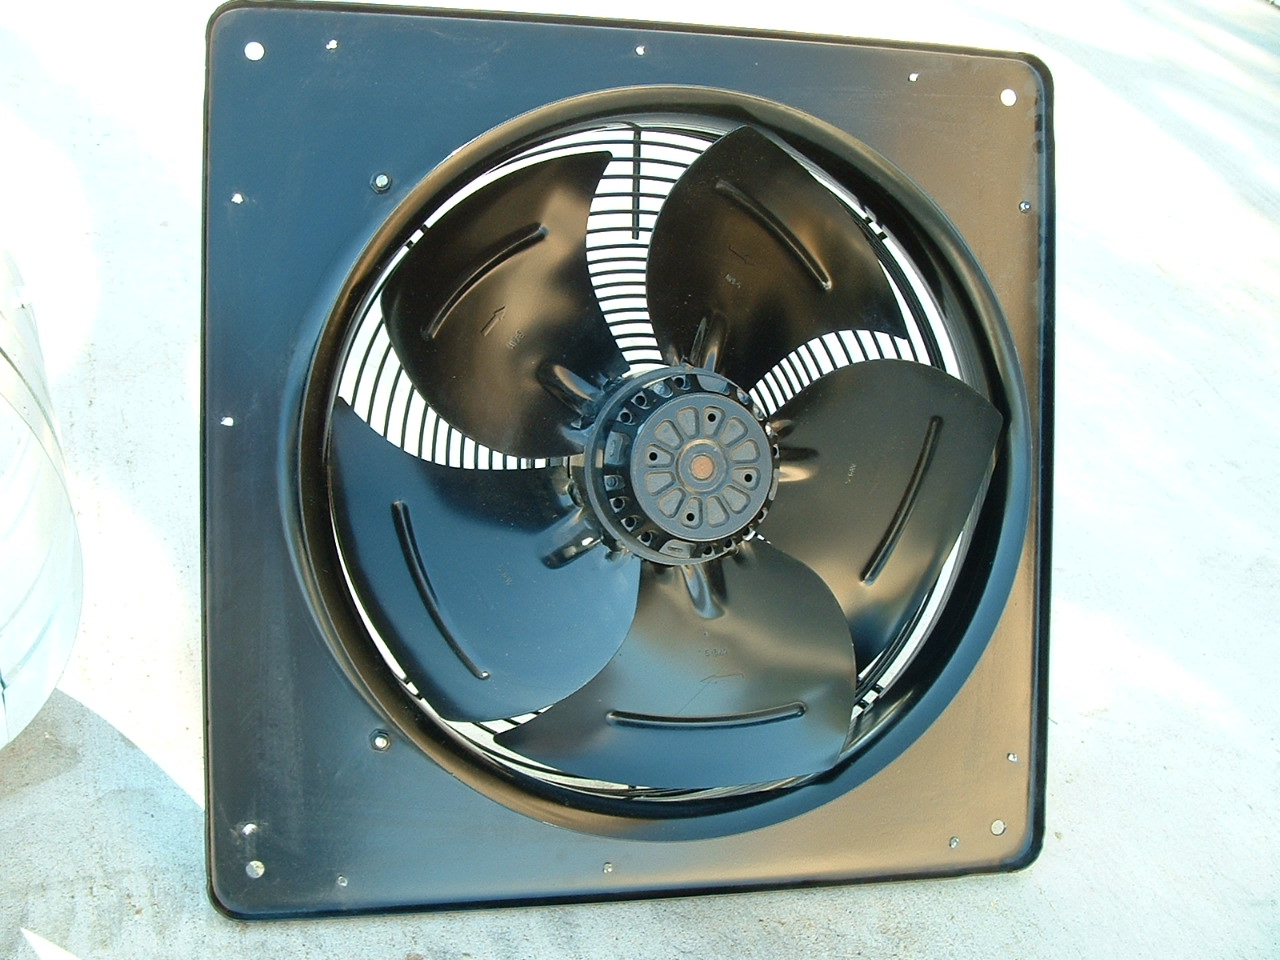
We import a vibration free, powerful, reliable powered attic fan manufactured in Germany. This attic fan is unlike any other available. This fan features an external rotor to which the fan blades are welded. This unique design reduces blade flex and vibration, and eliminates one of the shaft bearings. The bearings are sealed and never need maintenance. We include an adjustable thermostat and an optional mounting box with this system. Install it, set the thermostat and forget about it. It costs 2 cents per hour at .10/KWH to operate. This equates to approximately $6/month!
Warning: In homes that have gas appliances such as water heaters or furnaces in the attic, great care must be taken to insure adequate intake venting (gables/soffits), is provided so as to not create a negative pressure that will draw combustion gasses down the chimney of gas appliances. Installing an attic fan in this application has the potential for fire or filling your attic with carbon dioxide. Just make certain there is sufficient intake openings to circumvent this potential hazard.
Construction Features of 14" German Fan
- Motor: 1/4 Hp 115/1/60 (compare this home store fans rated at 1/8hp)
- Adjustable thermostat included
- Costs 2 cents per hour at 10 cents per KWH
- CFM @ 0.0 " SP: 1839 cubic feet per minute (Actual, not estimated)
- Integral Blades and External Rotor allowing precision balancing
- Formed steel wall panel with Venturi
- Shallow profile with no protruding motor
- External rotor motor, class B insulation.
- Quality design provides long and maintenance free operation for many years
- No maintenance required
- Automatic Reset Thermal Overload Protection
- Electro statically applied polyester/epoxy urethane powder coat finish
- Self lubricating, sealed for life precision ball bearings
- Can be installed in gable vent or under dormer vent
Specifications for Other Sizes - Performance Data
|
Fan Model |
RPM | Volts |
Max. Watts |
Max. Amps |
0" | .100" | .125" | .25" | .375" | .5" | Sones** |
| 8" PAV | 1550 | 115 | 45 | 0.41 | 304 | 246 | 224 | 74 | - | - | 4.1" |
| 10" PAV | 1500 | 115 | 68 | 0.62 | 624 | 558 | 533 | 377 | 132 | - | 7.9 |
| 12" PAV | 1400 | 115 | 130 | 1.19 | 1208 | 1069 | 1030 | 797 | - | - | 9.4 |
| 14" PAV | 1200 | 115 | 245 | 2.24 | 1839 | 1654 | 1599 | 1295 | - | - | 9.6 |
| 16" PAV | 1400 | 115 | 458 | 4.19 | 3054 | 2882 | 2839 | 2570 | 2198 | 1699 | 12.0 |
| 18" PAV | 1550 | 115 | 698 | 6.39 | 4115 | 3895 | 3840 | 3549 | 3239 | 2908 | 14.3 |
| 20" PAV | 1100 | 115 | 435 | 3.98 | 3693 | 3368 | 3279 | 2775 | 1429 | - | 10.7 |
| 20" PAV | 1450 | 115* | 916 | 8.39 | 4949 | 4682 | 4615 | 4274 | 3917 | 3445 | 16.4 |
| 22" PAV | 1000 | 115* | 756 | 6.92 | 5629 | 5248 | 5153 | 4432 | - | - | 12. |
| 25" PAV | 1000 | 115* | 1134 | 10.38 | 7858 | 7355 | 7230 | 6567 | - | - | 14.8 |
** The sound ratings shown are lSonesss values in fan sones at 5 Ft. (1.5 m) in hemispherical free field calculated per AMCA Standard 301. Values shown are for installation Type A: Free inlet fan Sones levels. All Sone values shown are calculated at 0.1" (static pressure in inches W.G.).
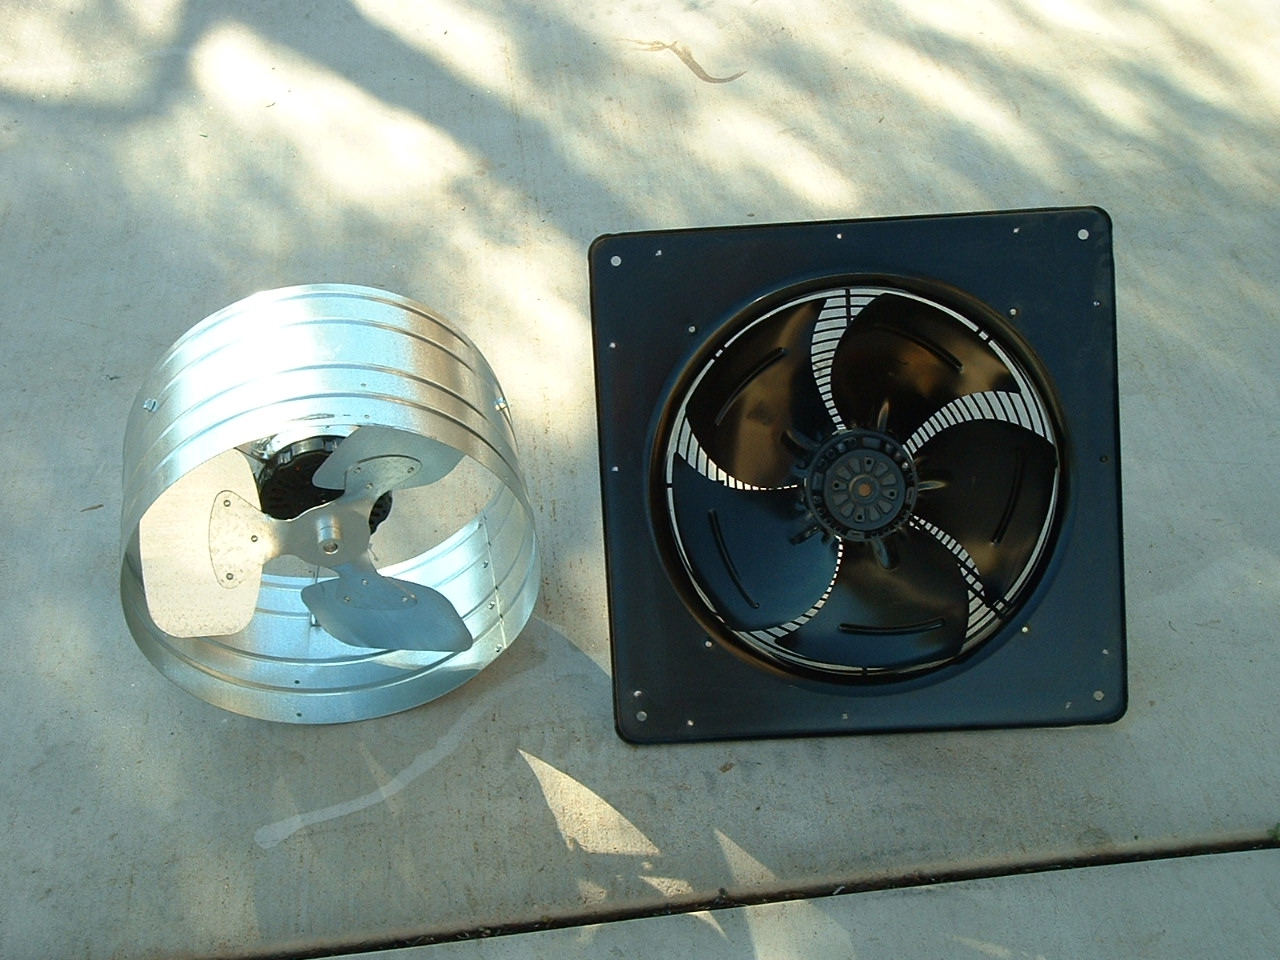
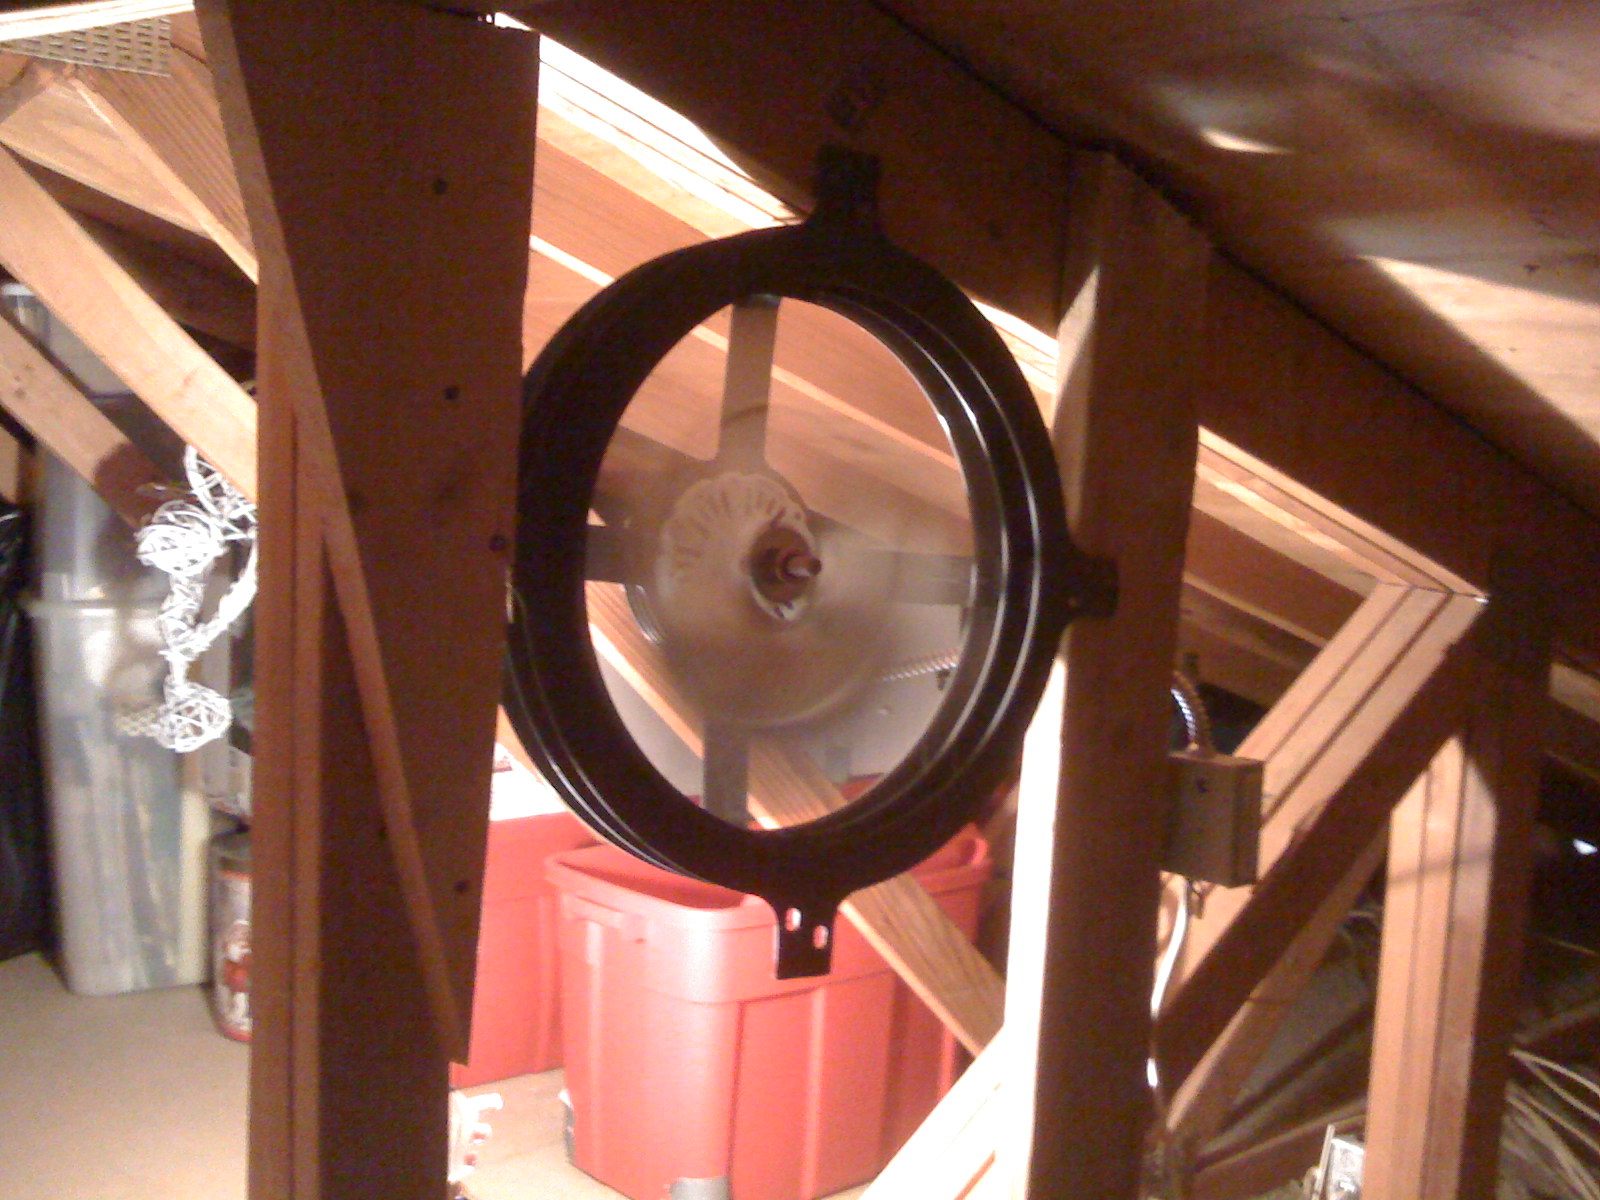
Home store fan vs our German exhaust fan.
Which fan looks like it's more efficient at moving air out of your attic? Over the years we have found home store attic fans to be a liability to our installations and the only weak link in our proven NRG Package. Since a properly installed radiant barrier increases attic air temperature by keeping unwanted heat from getting into the insulation, removing this waste heat has forced us to become experts in attic ventilation. Home store fans like the ones pictured are under powered, last only one year if you are lucky, and have an inaccurrate thermostat that sticks on and/or off. Maybe the nice ones cost more, but in this case you get what you pay for.
To visit our online store to order click here
SIZING:
Includes the fan with thermostat and 6' of Romex control wire pre-wired to the thermostat which speeds up the installation. You need only to mount the fan, mount the thermostat and bring a 110volt power supply to the thermostat. Prices below also include UPS ground shipping. NOTE: The sizing information below is based on a roof pitch between 2/12 and 6/12. For steeper roof pitches with attics that have higher air volumes, move up to the next larger size of attic fan.
- 8" fan 304 CFM $296 (sufficient to ventilate attics up to 500 square feet)
- 10" fan 624 CFM $332 (sufficient to ventilate attics up to 800 square feet)
- 12" fan 1208 CFM $373 (sufficient to ventilate attics up to 1375 square feet)
- 14" fan 1800 CFM $444 (sufficient to ventilate attics up to 1850 square feet)
- 16" fan 3054 CFM $468 (sufficient to ventilate attics up to 2800 square feet)
Pricey? Well, you could buy several home store fans for the price of one of these....then plan on replacing it every year because that's how long they last (see testimonial below). With our fan....you won't because of the quality, the thermostat and sealed motor bearings that never need lubrication...
If you open the box upon delivery of this item are not totally impressed with the craftsmanship and quality, return it for a full refund. We do not offer any product on our site that have not been field tested in all climates.
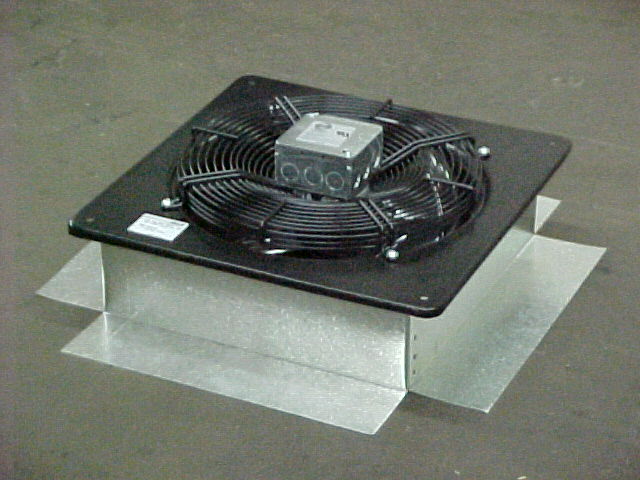
14" fan shown here with optional fan mounting box (see below).
We fabricate this sheet metal box for our installations. The design, including large side flanges, allows for a easier and more secure, quiet installation. This mounting box can cut the installation time in half. It costs $40 and this includes shipping if purchased with fan.
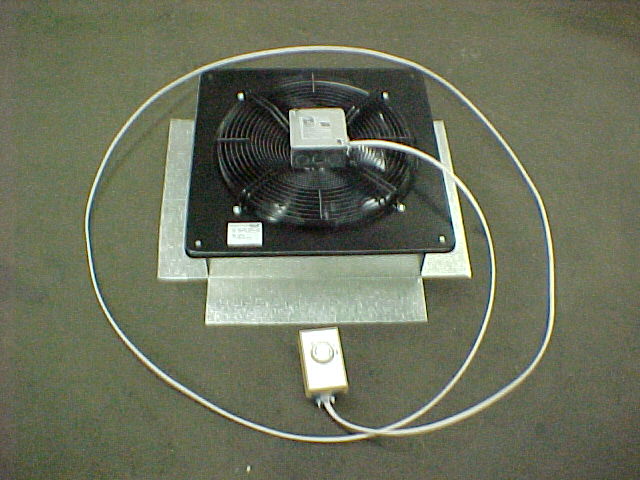
This is how the fan will look when you open the box. The fan is mounted to the sheet metal box and there is 6' piece of 14 gauge Romex already pre-wired to the fan and thermostat. We provide a 2"x4" mounting box to mount the thermostat so all you need to do is run a 115 v power supply to the thermostat, mount the fan shroud to the wall, set the thermostat to 105 F and call it a day.
Please note: the face plate and dial to the thermostat are in the small cardboard box.
Please email us with your questions, technical and application issues. We do not want to increase the price of these fans to include support so please, email first and if your concerns cannot be addressed via email or our updated website, we can talk by phone.
From a customer in the Midwest:
THE 12" FAN ARRIVED YESTERDAY {Friday June 23, 2006} AT APPROXIMATELY 12:00 NOON BY UNITED PARCEL SERVICE AND I HAD A CONTRACTOR INSTALL IT TODAY {Saturday June 24, 2006} IN THE FRONT PART OF THE GARAGE ABOVE THE DOUBLE OVERHEAD GARAGE DOOR OPENING WHERE A "VENT" WAS PLACED WHEN THEY BUILT THE HOUSE FOUR YEARS AGO. YES, THE TWO ROOF VENTS OVER THE GARAGE WERE BLOCKED OFF BY STAPLING BOTH WITH A PIECE OF CARDBOARD PER YOUR ADVICE SO THAT THE ONLY AIR NOW COMES FROM THE FIVE (5) ROOF VENTS OF THE HOUSE PLUS THE SOFFITS. AND YES, THE FAN IS INSTALLED CORRECTLY BY HAVING IT COMPLETELY ENCLOSED IN A BOX MADE UP OF A PIECE OF 3/4" PLYWOOD {A ROUND HOLE CUT INTO IT FOR THE FAN} AND ALL FOUR SIDES WITH {2" X 4"}. THERE ISN'T ANY "OPEN AIR SPACES" AROUND THE BOX AS THE BOX COVERS THE ENTIRE VENT AREA PUT IN THE FRONT OF THE GARAGE WHEN THEY BUILT THE HOUSE. NOTE: THE OLD FAN WASN'T INSTALLED PROPERLY AND LOOKED EXACTLY LIKE THE PICTURE ON YOUR WEB SITE WHERE IT'S OPEN ALL AROUND THE FAN HOUSING. ISN'T THAT A SHAME THAT A CONTRACTOR WOULD DO SUCH SLOPPY WORK. I DIDN'T USE THESE SAME CONTRACTORS AND WOULDN'T RECOMMEND THEM TO ANY ONE. THE NEW CONTRACTOR DID A WONDERFUL JOB.
YES, SO FAR THE NEW FAN IS QUIET AND I'm GLAD IT'S IN BEFORE THE HEAT OF THE SUMMER FORBIDS ONE FROM ENTERING THE ATTIC TO INSTALL ONE. HOPEFULLY THE 12" FAN WILL DO THE JOB AS YOU TALKED ME OUT OF THE 14" FAN SAYING I WOULD BE OVER DOING IT. THE OLD FAN WAS ONE YEAR OLD AND WAS------"WHISPERCOOL" ATTIC VENTILATOR 1320 CFM, MODEL # 53319 WCGB 12"------AND THE MOTOR WAS SHOT AND WOULDN'T RUN AT ALL. HOPEFULLY THE NEW FAN THAT I PURCHASED FROM YOU WILL LAST MUCH LONGER AS IT'S QUITE EXPENSIVE ON SOCIAL SECURITY MONEY.
THANKS FOR ALL YOUR TIME AND THE VALUABLE INFORMATION
MARVIN
Another:
My purchase of an attic vent fan was a completly good experience. I like your website.....lots of information. .....until.....people "get it"...your product and the packaging it arrived in reminded me very much of the aircraft I worked on ....solid, extreme quality, excellent design, applied correctly to solve a problem........most people will not pay for that....I learned that the long hard way.....very few people will "take a chance" for quality....lots of folks have no clue about saving energy. Your web site should be read by everyone!
Regards,
Mark B.
If you live in Phoenix click here to find out about our Home NRG Audits©. For those of you in cold climates, cut your heating bills with our revolutionary product, Thermal Control Membrane.