 Contact us: 602-867-3176
y conservation. How to properly insulate your home
Contact us: 602-867-3176 
PROPRIETARY PATENTED SUSTAINABLE BUILDING PRODUCTS


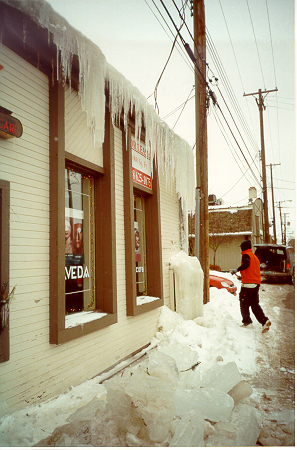
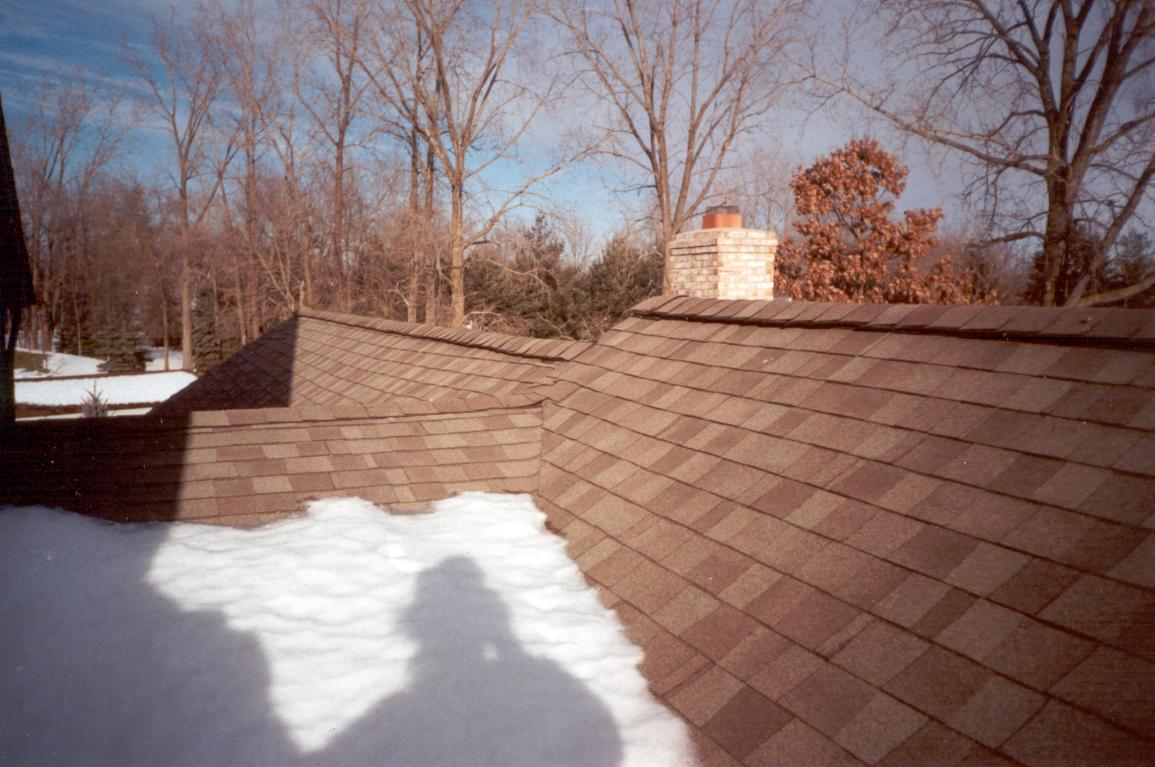
Ice Dam Problems?
Ice dams can cause serious structural damage from water leaks
mold growth, or just by the sheer weight as can be seen here
SYMPTOMS vs PROBLEMS
By: Brad Lindsay, President Horizon Energy Systems Copyright 01/01
The reality? Ice dams are not a problem. They are a symptom of your roof getting warm enough to melt snow. Therefore, keeping your roof deck below 32 degrees will make the symptoms go away. Ice dams, like fire, need three constants to exist. For fire it's fuel, heat and oxygen. For ice dams it's heat, source (snow), freezing temperatures and gravity. Gravity is has been a tough one to deal with so that leaves freezing temperatures snow and heat. Can't really control the weather so let's focus on reducing heat getting to the roof deck.
Obviously, good venting is a basic foundation for any healthy attic, winter or summer. So make sure your attic is well vented. For tips visit our venting page. In a nutshell, if you live in a climate that creates ice dams, you should consider installing:
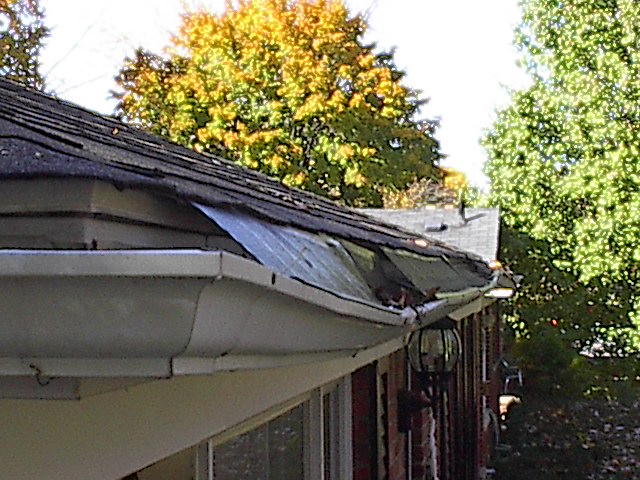
Heat which is convecting and radiating from the top of the insulation is warming the roof. This effect is multiplied as the source of heat (the top of the insulation) is the closest to roof...near the outside walls. This melts the snow, causes water to flow and hence the creation of ice dams. When the water flows beyond the warmth of the attic it either runs over the edge of the roof and creates icicles or freezes along the edge of house creating the ice dam when the roof extends past the outside wall. Here the ice starts forming because there is no heat source to keep it from freezing.
As the dam gets thicker (taller), melted water backs up and will eventually start leaking under the shingles, into the attic where it will eventually leak through the ceiling and walls. It's an eering feeling to visit a customers home and hear water dripping inside the walls!
As I write this I'm in Detroit (Jan 01), and read in the news yesterday about two homes that caught fire due to shorting of electrical wiring caused by water from ice dams. Tonight (1/4/01), on channel 4 news, a woman is seen entering her home with a respirator and protective suit. It seems the water seeping into her home fostered a toxic mold that was affecting her family's health. Her home is now uninhabitable and must be decontaminated before occupancy....
Updated 2/10

FACT: Icicles and ice dams are visual proof you are melting snow with your heating dollars.
For testimonials from our customers, click here
Insulation, Remodeling and HVAC contractors, dealerships available click here
Visit our online NRG Store: Click here
Solutions for Ice Dams
Properly Installed venting
Fact: Most homes are severely under vented. Fact is, few meet minimum code! We have found many cases where previous gable or soffit venting has been completely covered by siding or plastic "no paint" soffit trim. It is my opinion (formed from twenty years of home inspections), that there should be an attic vent opening between each rafter at the soffit and adequate exhaust venting along the peak of the roof. There has been a trend among roofers, remodelers and new home builders to install ridge vents across the top of the roof and many times removing existing roof venting. A news station in Detroit aired that "it is recommended to remove your existing roof vents and install a running ridge vent across the top of your roof".
IMPORTANT!
Our research has shown most vents installed in the snow belt are either ridge vents or 12" square roof vents. Why is this a problem? If you get more than 3" of snow, the vents you are relying on to vent the warm, moist air from your attic are plugged with snow when you need them the most! This scenario most likely is a key ingredient in the formation of ice dams and mold growth in your attic. Unfortunately, adding the correct venting after the home is built is both difficult and costly.
Our testing has shown an Aura Vent allows for better air flow than a continuous ridge vent, even in heavy snow when you need attic venting the most. We were surprised to find this during our testing and now recommend the use of them in both hot and cold climates. When outside air can enter the attic above the insulation it prevents the roof from getting warmed by the heat radiated or convected out of the attic insulation.
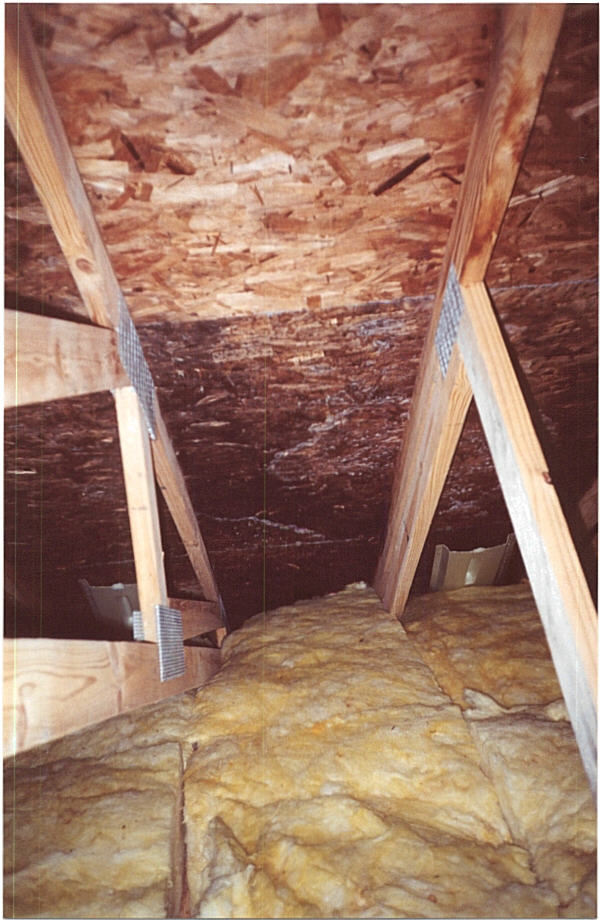
Air Chutes (aka soffit baffles, insulation trays)
Air chutes are installed between the attic insulation and the roof decking.
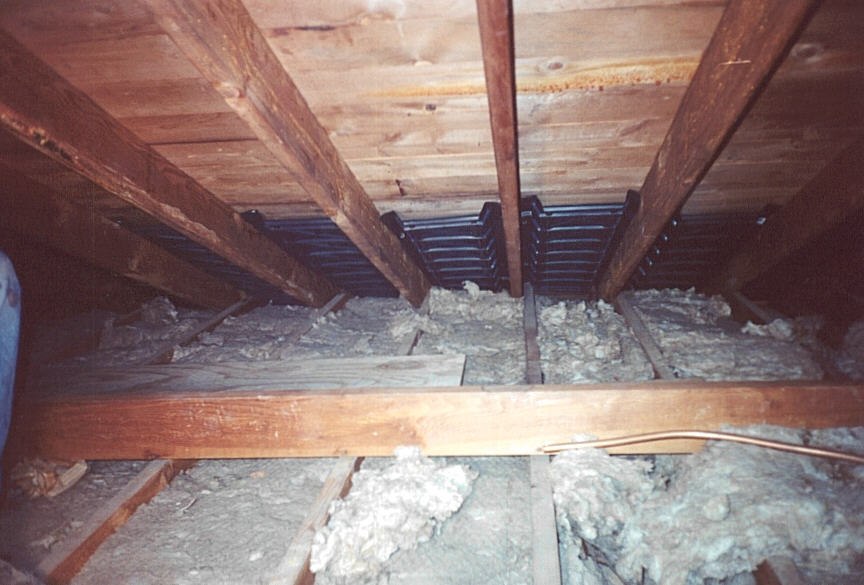
Here you can see baffles stapled up to the bottom of the roof decking. Keeps insulation from the roof deck and insures air can pass between the roof deck and the warm insulation.
Great application for our TCM product. A 48" wide piece of our reinforced TCM stapled behind these chutes would most certainly eliminate ice dams forever. Great combination, someone should try it, I just thought of it.
Made from cardboard, plastic or foam, these are typically installed when a building is being constructed. Installing them after the insulation is installed is quite a task but necessary.
IMPORTANT: At no point should there be attic insulation in direct contact with the roof decking. This is called "thermal bridging ". Home Depot has them in the building material section near the venting isle. I have installed all types and find the black plastic ones shown here the easiest to work with. They cost a little more but anything that cuts down the time spent rolling through attic insulation is worth it.
INSTALLATION:
Be sure and remove any insulation plugging the area between the attic and the soffit. Then slide the soffit baffle in and staple it up with a swing tacker, or aka hammer tacker. Home Depot has these as well. I recommend the Arrow brand and 3/8" staples.
Properly installed insulation
Since ice dams form above the exterior walls, it is here that the focus should be insuring the correct installation of attic insulation. Your attic insulation should be thick enough to cover your ceiling rafters and not have any ceiling rafters exposed.
If you are having insulation installed, be sure and relate this to your contractor prior to adding more insulation. Air chutes installed between the roof deck and insulation can eliminate many future headaches.
Return to our main page click here
Email us for more info or how to install it yourself click here
Questions? Email us at pleasesavenrg@gmail.com or call our office at 602-867-3176.


Web page design and maintained by B Rad Design Group.
Copyright 1997-2020. All images and text copyrighted by Horizon Energy Systems.


